
Green screen Premiere Pro: Top 3 Flawless Tips
Why Green Screen Premiere Pro Opens Creative Doors for Your Business
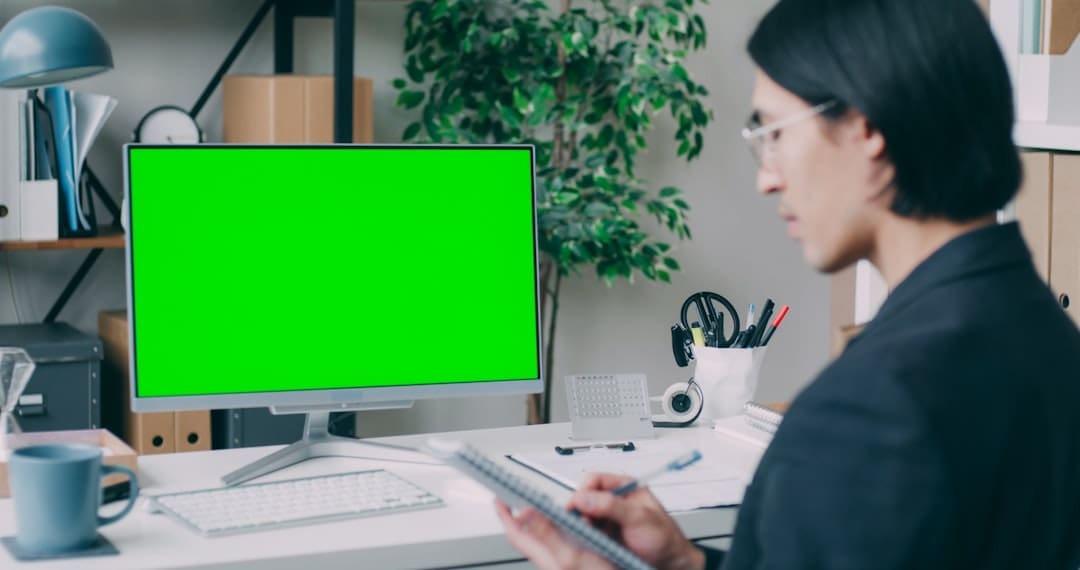
Green screen Premiere Pro is a powerful technique for changing your video content without expensive location shoots. At its core, green screen (or chroma keying) lets you film a subject against a solid green background and then digitally replace that background with anything you want—a beach, a cityscape, or a branded animation.
Here’s the quick answer if you’re ready to start:
Basic Steps for Green Screen in Premiere Pro:
- Film your subject against an evenly lit green screen
- Place your green screen clip on video track V2 (above your background on V1)
- Apply the Ultra Key effect from Effects > Video Effects > Keying
- Use the eyedropper tool to select the green color
- Adjust Matte Cleanup settings (Choke, Soften, Spill Suppression) to refine edges
That’s the essence, but getting professional results requires understanding lighting, proper setup, and knowing which settings to tweak.
I’m Christian Daniel, and with over two decades of experience producing video for clients like The Plaza Hotel and Park Hyatt Chicago, I’ve mastered green screen Premiere Pro techniques to create polished content on tight budgets. In this guide, I’ll walk you through everything from shooting correctly to achieving seamless composites that lift your brand’s story.
 to create a transparent alpha channel, then composited over a new background image or video to create the final polished result. The graphic shows three stages: 1) Subject + Green Background (original footage), 2) Keying Process (Ultra Key removes green, creates transparency), 3) Subject + New Background = Final Composite (professional result). - Green screen Premiere Pro infographic")
Quick Green screen Premiere Pro definitions:
Setting Up for Success: How to Shoot Perfect Green Screen Footage
I learned the hard way that no amount of green screen Premiere Pro wizardry can save poorly shot footage. About 80% of your final quality comes down to how you shoot it. The technical term is chroma keying—where Premiere Pro isolates a specific color (usually green) and makes it transparent. If that green isn’t consistent, the software struggles.
You’re telling Premiere Pro to remove one specific shade of green. If shadows and hotspots create multiple shades, the software gets confused, and the key gets messy.

Why Lighting is Everything
Lighting is everything in green screen work. My goal is always a perfectly even, shadow-free backdrop. When I get it right, keying in Premiere Pro takes minutes instead of hours. Aim for a green screen luminance of 40-50%—not too bright, not too dark. On pro shoots, I use a waveform monitor to check for an even flat line, which confirms consistent brightness.
Diffused lighting is your best friend. I use softboxes or lights with diffusion gels pointed at the green screen to create soft, even light and avoid harsh shadows or bright spots. A common mistake is lighting the subject and screen together. You must separate your lighting. First, light the green screen evenly. Then, light your subject. This prevents the subject’s shadow from falling on the screen and ensures they are lit correctly for the final background.
Shadows and hotspots ruin your key by creating different shades of green, which confuses the Ultra Key effect.
Preparing Your Subject and Space
Once lighting is dialed in, I focus on details that prevent headaches like green spill. Position your subject 10 to 15 feet away from the screen. This prevents shadows and dramatically reduces green spill—the green tint that reflects from the screen onto your subject. You might not see it while filming, but it creates an unnatural glow in post-production.
For clothing, avoid anything green or with green undertones (some khakis or grays). Also, avoid reflective objects like shiny jewelry or glasses, as they can catch the green light and create transparent spots.
For close-ups, keep makeup powder handy. Skin shine can reflect the green screen, causing keying problems around the face. A quick dusting of powder solves this. Finally, ensure your green screen is smooth and wrinkle-free, as every wrinkle creates a shadow. Iron or steam fabric screens.
These setup details save enormous time in post-production. A well-shot clip makes working in Premiere Pro feel like magic, letting me focus on creativity instead of technical fixes. For more foundational tips, check out my Video Editing Tips for Small Businesses guide.
Your Step-by-Step Guide to Green Screen in Premiere Pro
With your pristine footage captured, it’s time for the magic in Adobe Premiere Pro. The green screen tools have improved immensely over the two decades I’ve been using the software.
Setting Up Your Timeline
The secret to successful green screen Premiere Pro work is proper timeline organization. First, import your footage (green screen clip and background) into the Project panel. If you’re new to this, I recommend practicing with Adobe’s sample files to practice with.
Next, create a new sequence by right-clicking your green screen clip and choosing “New Sequence From Clip.” This automatically matches your sequence settings to your footage.
Place your background on Video Track 1 (V1) and your green screen footage on Video Track 2 (V2). Premiere Pro layers tracks from the bottom up, so when the green is removed, your subject will appear in front of the background. If resolutions differ, select the clip and use the Scale property in the Effect Controls panel to adjust its size. Matching the perspective between subject and background early makes the composite more believable.
Applying the Ultra Key Effect for Green Screen Premiere Pro
With your clips layered, it’s time to use the Ultra Key effect. This is Premiere Pro’s powerhouse tool for chroma keying.

Open the Effects panel (Window > Effects) and search for “Ultra Key.” You can also find it under Video Effects > Keying > Ultra Key. Drag the Ultra Key effect onto your green screen clip on V2.
In the Effect Controls panel, find the Ultra Key settings. Under the Key Color option, click the eyedropper tool, then click on the green background in your Program Monitor. The green should disappear, revealing your background.
Pro tip: Command-drag (macOS) or Control-drag (Windows) the eyedropper over a small area of the green. This samples a 5×5 pixel average instead of a single pixel, giving a cleaner initial key, especially with slight lighting variations.
Your basic key is now in place. Next, I’ll refine the edges for a professional composite.
Refining Your Key: Pro Tips for a Flawless Composite
After the initial key, you’ll likely see jagged edges, a green halo, or transparent patches. This is where the real craft of green screen Premiere Pro work begins. The Ultra Key effect’s controls (Matte Generation, Matte Cleanup, Spill Suppression, Color Correction) are essential for turning a rough key into a polished composite.

Cleaning Up the Edges and Details
This is where the Matte Cleanup settings become my best friends. The Choke slider is my most-used control; it shrinks the matte’s edges inward to remove green halos. Be subtle, as too much Choke will eat away at your subject. Next, Soften gently blurs the edges, which can look too sharp after using Choke. A subtle amount (1-2 pixels) creates a more organic transition, especially around hair.
The Matte Generation settings control transparency. Increase Transparency to remove faint green patches. Increase Tolerance to key out more shades of green, which helps with uneven lighting. For low-light footage, the Pedestal control helps filter out noise in dark areas.
A key technique is switching the Output menu to Alpha Channel View. This shows a black-and-white matte: white is your opaque subject, black is the transparent background. Gray areas indicate unwanted partial transparency. I always aim for a crisp black-and-white image here before proceeding.
Troubleshooting Common Green Screen Premiere Pro Issues
Even with a perfect shoot, green spill—a green tint reflected onto your subject—is a common problem. Ultra Key’s Spill Suppression section is the solution. The Desaturate slider neutralizes the green tint, and Range defines which colors are affected. For stubborn spill, I use the internal Color Correction controls or my broader Color Grading Premiere Pro skills.
For unevenly lit screens, I use garbage mattes. These are simple masks (found under Opacity in Effect Controls) drawn around the subject to cut out problem areas of the screen that Ultra Key can’t handle. For persistent spill on hair, I’ll apply the Change to Color effect (Video Effects > Color Correction), select the spill, and shift its hue or saturation.
My top three Ultra Key settings are the Key Color Eyedropper (using Command/Control-drag), Choke for fringes, and Spill Suppression’s Desaturate for reflections. Master these, and you’re 90% of the way to a professional composite.
Creative Applications and Final Touches
Once the technical side of green screen Premiere Pro is done, the creative storytelling begins. Chroma keying is more than a trick; it’s a gateway to creating visuals that would otherwise be impossible or too expensive.

Making Your Composite Believable
The difference between a fake and a professional composite is in the details. Adding blur to your background is a key trick. Real cameras create depth of field, so a razor-sharp background looks fake. I apply a ‘Fast Blur’ effect to the background on V1, adjusting the amount to simulate distance.
Color grading and matching is also crucial. A subject shot under cool lights won’t fit a warm sunset scene. I adjust color temperature, exposure, and saturation on both layers until they feel like they were shot in the same environment. My Color Grading Premiere Pro guide covers this in more detail.
Also, ensure lighting direction matches between your subject and the background. Finally, scaling and positioning are vital for perspective. I use the Motion controls to adjust size and placement so the subject fits believably within the new environment.
Beyond Basic Backgrounds
Creative applications for green screen Premiere Pro are vast. For my New York clients, I’ve built virtual sets that turn a studio into a newsroom or luxury lobby. This flexibility turns one space into infinite locations. I also love adding animations and graphic elements, like floating logos or data visualizations.
For special effects, green screen is foundational, allowing subjects to shrink, fly, or interact with impossible worlds. I’m always inspired by creative studios, like one that used liquid paint as a green screen for unique effects.
Practically, green screen offers massive cost savings and flexibility. Instead of expensive and difficult location shoots in NYC, I can create diverse scenes from a single studio. This is a huge benefit for small businesses needing high-quality video on a budget. As a Freelance Video Editor NYC, I rely on these techniques to deliver professional, cost-effective content for my clients.
Frequently Asked Questions about Green Screen Editing
After two decades using green screen Premiere Pro, I’ve heard the same questions from new editors. Here are the answers I’ve learned.
Why use a green screen instead of a blue screen?
While both work, I almost always use green. Green is furthest away from human skin tones, which is its biggest advantage. This makes it easier for Premiere Pro to separate the subject from the background. Blue is closer to some skin undertones, which can complicate keying. Also, modern digital cameras are more sensitive to green light, which results in cleaner keys with less noise.
That said, blue screens shine in low-light situations or when your subject is wearing green. The rule is simple: use whichever color isn’t in your shot.
Can I use my phone to shoot green screen video?
Yes, modern phones can handle it surprisingly well, but lighting is even more critical. Smaller sensors are less forgiving of uneven lighting, which makes keying much harder. I recommend using a camera app with manual controls for exposure and white balance.
Phone cameras have limitations: smaller sensors mean more noise, and video compression can complicate editing. For professional clients, I use dedicated camera gear. But for social media or internal videos, a phone can work if you light it well.
What’s the biggest mistake beginners make with green screen?
Three mistakes stand out as composite killers.
Uneven lighting is the number one mistake. Shadows and hot spots will haunt you in post-production. What could be a ten-minute fix on set becomes hours of frustrating, and sometimes impossible, cleanup work in green screen Premiere Pro.
The second mistake is positioning the subject too close to the screen. This causes green spill—color bouncing onto the subject—which is very difficult to remove cleanly.
Finally, the worst mindset is believing you can “fix it in post.” Premiere Pro’s tools are for refining good footage, not performing miracles on poorly shot video. Better raw footage always means a better final result.
Conclusion
Mastering green screen Premiere Pro can transform your video production. The ability to place your subject in any environment opens up a world of creative possibilities for social media clips and corporate presentations alike.
In this guide, I’ve shared my two decades of experience, from the importance of lighting and subject distance to the nuances of the Ultra Key effect. A seamless composite comes from understanding the why behind each setting and developing an eye for detail.
Your first attempts might not be perfect, and that’s okay. My early projects had jagged edges and green spill, too. With each project, your instincts will improve. The beauty of this work is that it gets easier and faster each time. Soon, you’ll spot lighting issues before you shoot and know exactly which settings to tweak.
If you find yourself stuck or want to lift your brand’s video content with professional editing expertise, I’m always here to help. After working with brands like The Plaza Hotel and Park Hyatt Chicago right here in New York City, I’ve seen how powerful well-executed green screen work can be for business storytelling.
Ready to keep learning? Explore more Video Editing tutorials and tips on my site. I’m excited to see what you’ll create with these skills.