WordPress performance optimization gzip compression 1 Pro
Why Your WordPress Site’s Speed Matters More Than Ever
WordPress performance optimization gzip compression is a simple, powerful way to speed up your website. Here’s the quick version:
Quick Answer: How to Enable Gzip Compression
- Using a Plugin (Easiest): Install WP Rocket, W3 Total Cache, or WP-Optimize and enable compression with one click.
- Manual Apache Method: Add compression code to your .htaccess file.
- Manual Nginx Method: Edit nginx.conf and add gzip directives.
- Verify It Works: Test at giftofspeed.com/gzip-test or check browser DevTools.
Why This Matters: Gzip can shrink your file sizes by 70-90%, drastically improving load times. When page load time goes from one to three seconds, the chance of a mobile visitor bouncing jumps by 32%. At five seconds, it’s 90%.
For hospitality businesses and creative professionals, a slow site costs bookings and sales. Gzip tackles this by shrinking HTML, CSS, and JavaScript files, resulting in faster loading, happier visitors, and better search rankings. With 82% of all websites already using Gzip, you can’t afford to be left behind.
I’m Christian Daniel, and with over two decades of experience optimizing sites for clients like The Plaza Hotel and Park Hyatt Chicago, I’ve seen how wordpress performance optimization gzip compression turns a sluggish site into a conversion machine.

What is Gzip Compression and Why Does Your WordPress Site Need It?
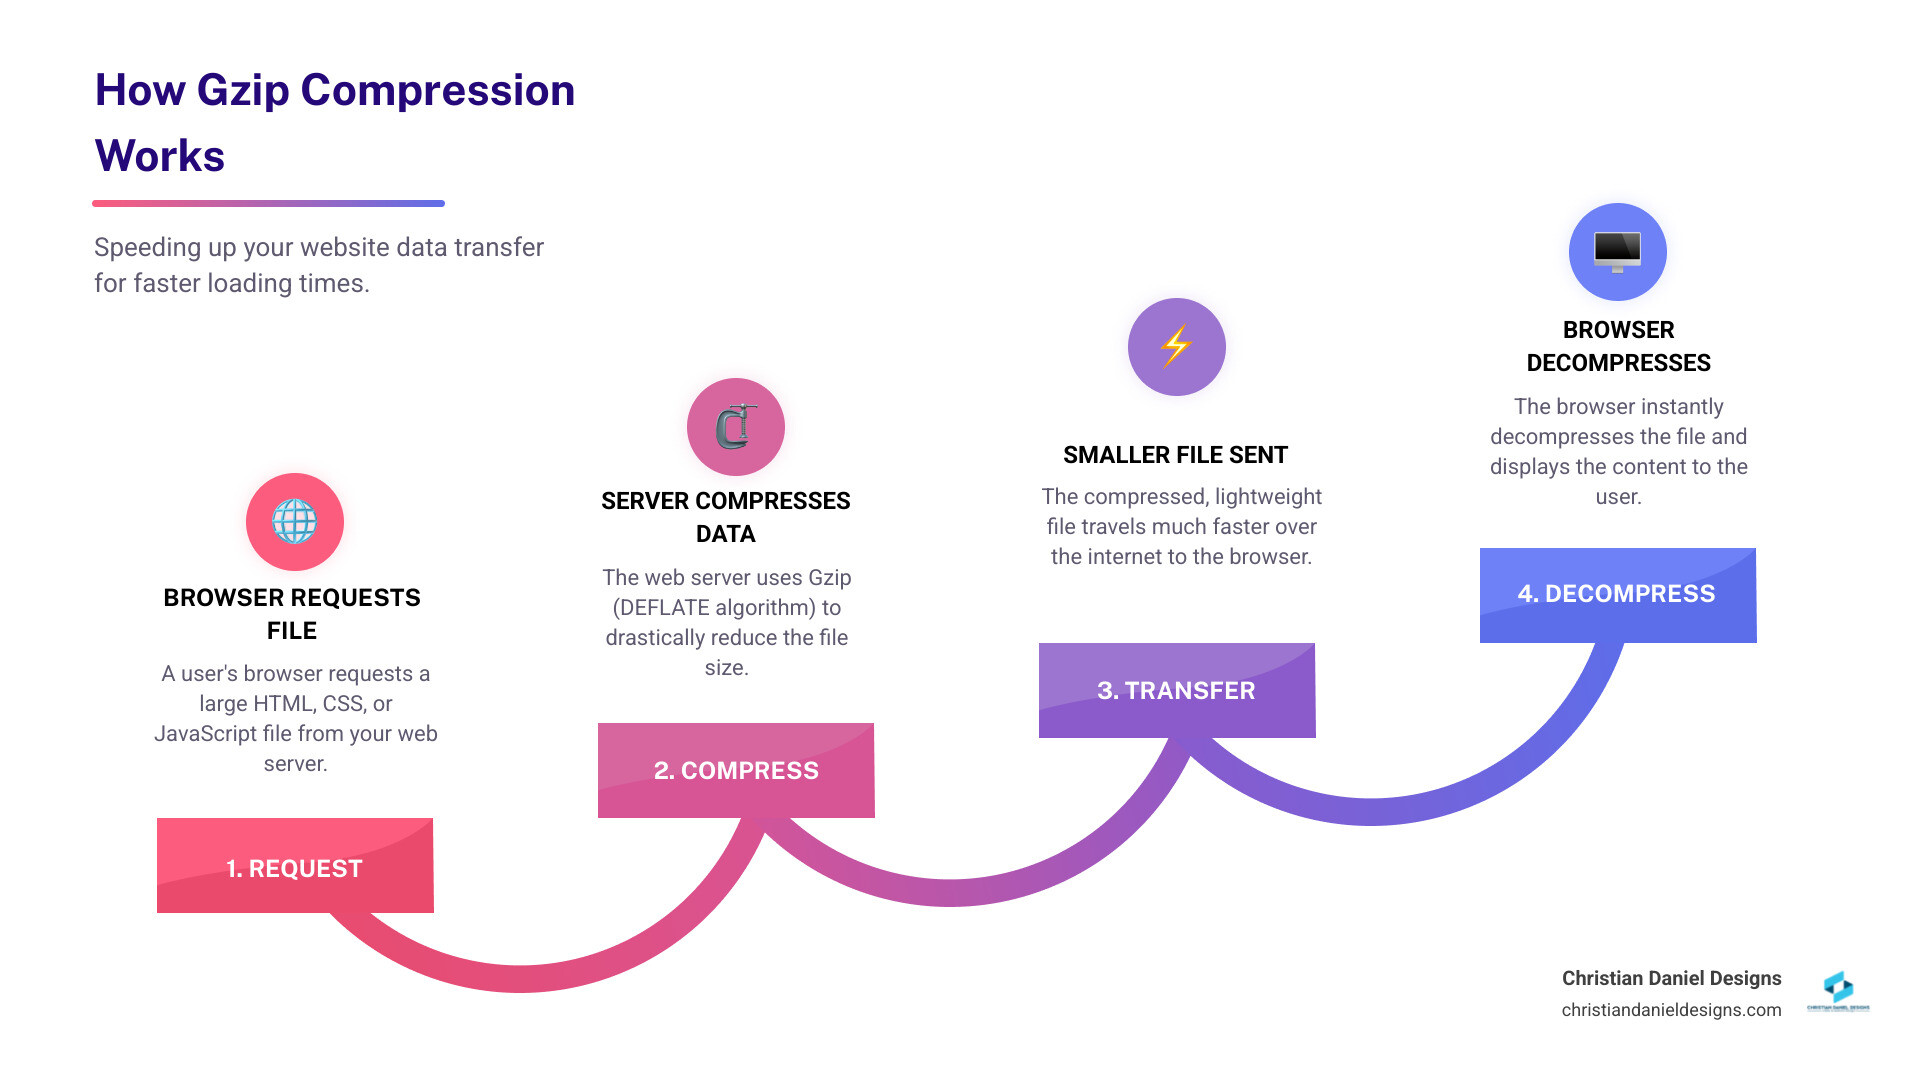
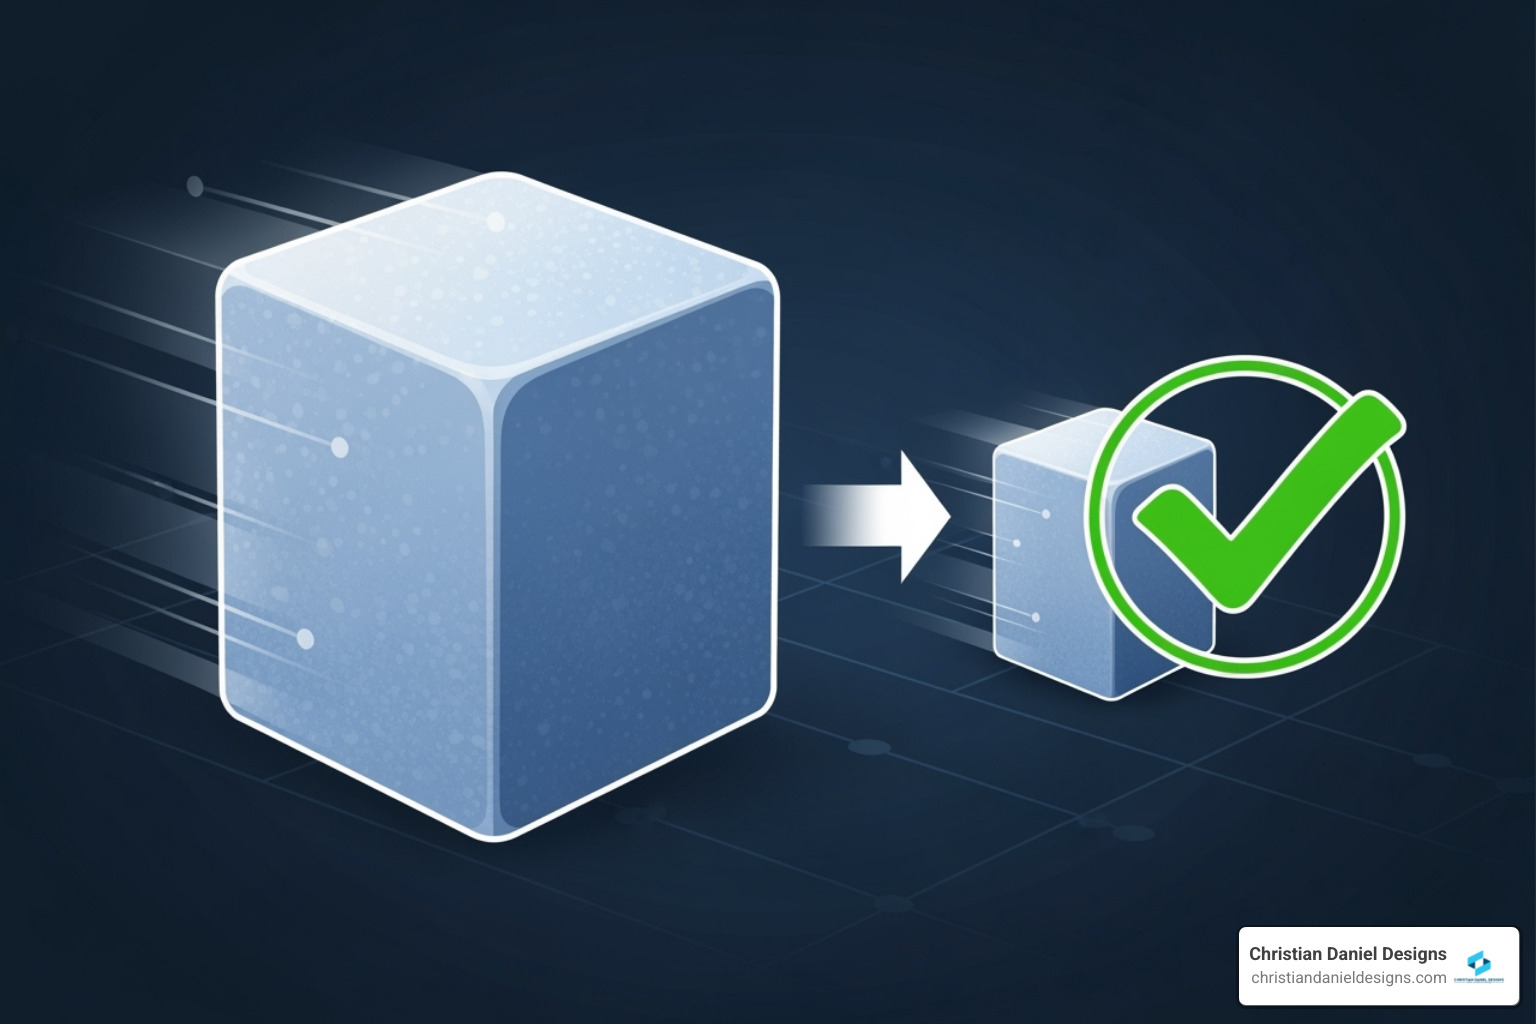
Think of Gzip compression like using vacuum bags to pack a suitcase. It squeezes your website’s files—HTML, CSS, and JavaScript—into a fraction of their original size so they travel faster across the internet. A 100 KB file might shrink to just 30 KB, a 70% reduction.
This works through the DEFLATE algorithm, which cleverly finds and replaces repeated strings of text with shorter references. It also assigns shorter binary codes to frequently used characters, further reducing file size. This compression is lossless, meaning your visitor’s browser receives the small file, decompresses it instantly, and displays your site perfectly with no quality loss.
When I implement wordpress performance optimization gzip compression for my clients, the benefits create a powerful ripple effect:
- Reduced Page Weight: Your HTML, CSS, and JavaScript files shrink by 50-90%. This is the most direct and impactful benefit.
- Faster Load Times: Smaller files download faster, especially for users on mobile or slower connections. This directly improves your Core Web Vitals scores, particularly Largest Contentful Paint (LCP), which Google uses as a key SEO ranking factor.
- Improved User Experience & Conversions: Faster sites keep visitors engaged. Research shows that improving page load time by just one second can boost conversion rates by 17%. For mobile users, a fast site is the difference between a visitor who stays and one who bounces.
- Better SEO Performance: Google rewards fast sites with better rankings. A quick-loading page signals a positive user experience, which helps you climb search results. Faster sites also allow search engine crawlers to index more of your content during each visit, ensuring your latest updates are seen quickly. As I often explain when teaching clients How to Get Your Web Page First on Google, speed is fundamental to search visibility.
After two decades of building websites, I’ve seen that Gzip delivers these measurable results with minimal effort. It’s a foundational optimization I include in my Web Design Small Business Guide because it supports every other goal: user satisfaction, search visibility, and business success.
How to Check if Gzip is Already Working on Your Site
Before enabling Gzip, check if it’s already active. Many modern web hosts and CDNs enable it by default.
The quickest method is using an online test tool. I recommend Check GZIP Compression. Just enter your URL, and it will report your compression status and savings. Similarly, website speed testers like Google PageSpeed Insights, GTmetrix, and Pingdom will flag a warning like “Enable text compression” if Gzip is missing.

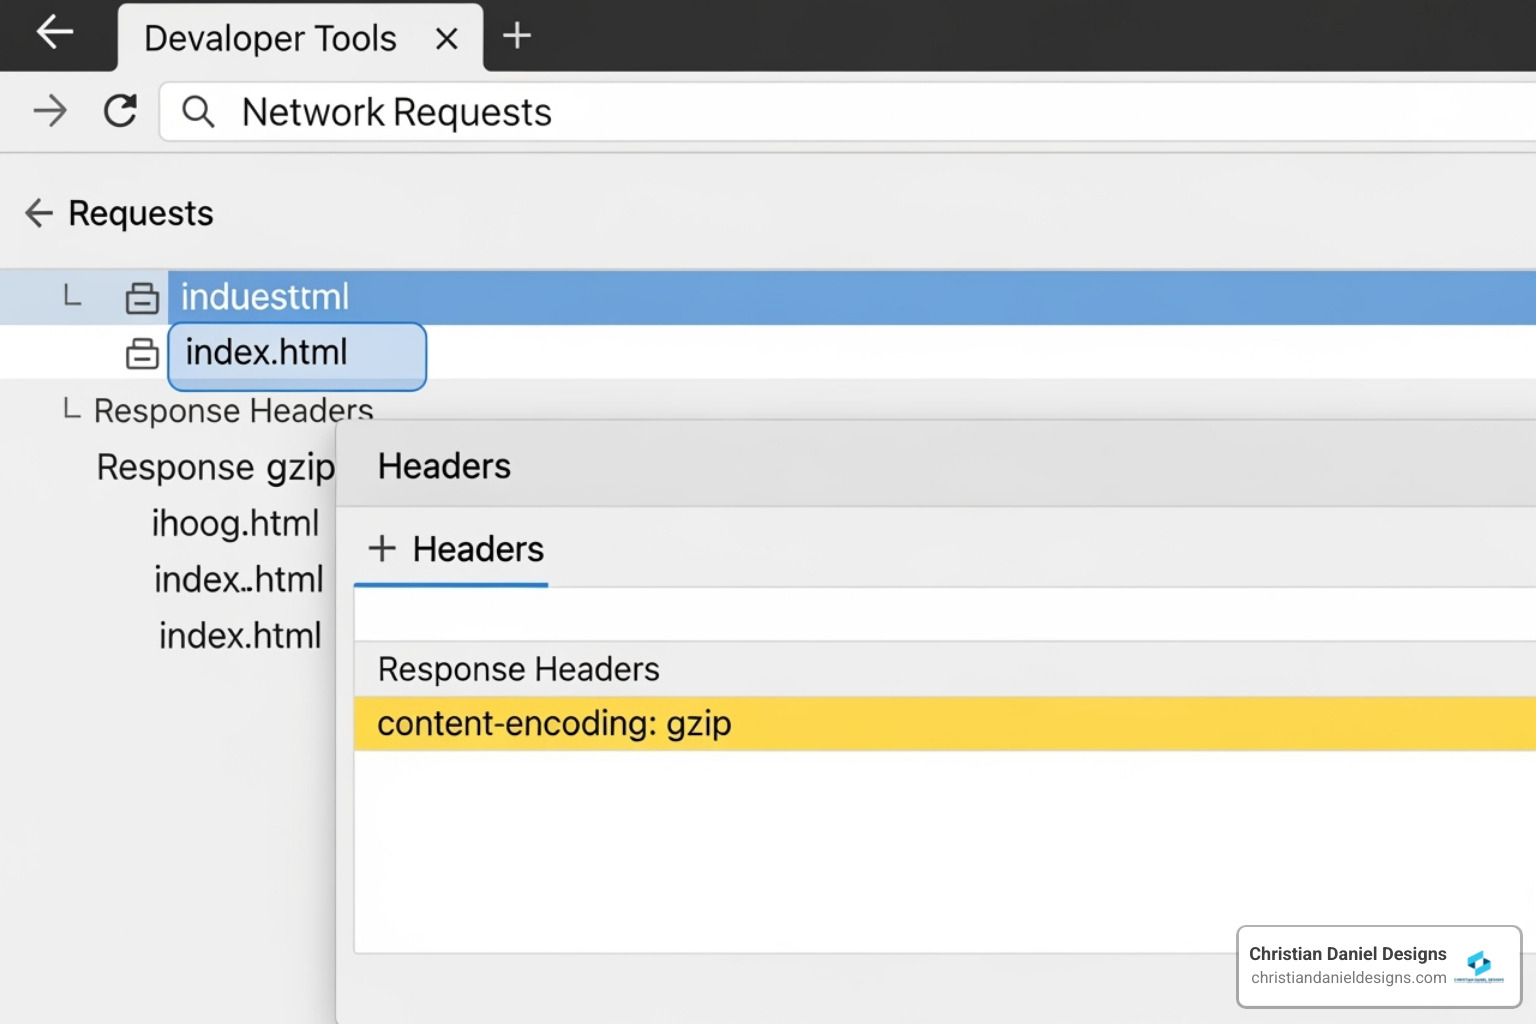
For a definitive check, you can inspect the HTTP response headers yourself. This confirms that your server is sending compressed files. The easiest way is with your browser’s Developer Tools.
Using Browser DevTools to Verify Gzip
This method gives you direct, real-time insight. It sounds technical, but it’s straightforward:
- Open Developer Tools: Right-click on your webpage and select “Inspect.”
- Go to the Network Tab: Click the “Network” tab in the panel that appears.
- Reload Your Page: Refresh the page to see a list of all requested files.
- Inspect a File: Click on your main HTML document (or a CSS/JS file) from the list.
- Check the Headers: In the new panel, look under the “Headers” sub-tab for “Response Headers.” If you see
content-encoding: gzip, it’s working for that file.

If you don’t see this header for your text-based files, Gzip isn’t active. In the next section, I’ll show you exactly how to enable it.
The Ultimate Guide to Enabling WordPress Performance Optimization Gzip Compression
If Gzip isn’t working on your site, enabling it is simple. You can use a plugin or manually configure your server. But first, a crucial step I tell every client: always take a full backup of your WordPress site (files and database) before making changes.
This is the kind of essential practice I cover in my Web Design for Business Owners guide, as it provides a safety net for any technical task.
The Easiest Method: Using a WordPress Plugin
For most users, a plugin is the safest and easiest route. Popular optimization plugins can enable Gzip with a single click.
- Top Choices: My premium recommendation is WP Rocket for its comprehensive, user-friendly features. Excellent free options include WP-Optimize and W3 Total Cache.
- How to Enable: Install and activate your chosen plugin. Go to its settings page (often under “Browser Cache,” “Performance,” or a similar name) and find the option to “Enable Gzip compression.” Check the box, save your changes, and clear all site caches. Finally, use an online tool to verify it’s working.
Manual Method 1: Enabling Gzip on an Apache Server
If you’re comfortable editing files and your site runs on an Apache server (common on shared hosting), you can edit your .htaccess file. This file is in your WordPress root directory.
First, back up your existing .htaccess file. Then, open it with a plain text editor and add the following code before the # BEGIN WordPress line:
<IfModule mod_deflate.c>
  # Compress HTML, CSS, JavaScript, Text, XML, fonts, and images
  AddOutputFilterByType DEFLATE application/javascript
  AddOutputFilterByType DEFLATE application/json
  AddOutputFilterByType DEFLATE application/x-javascript
  AddOutputFilterByType DEFLATE application/xml
  AddOutputFilterByType DEFLATE application/xml+rss
  AddOutputFilterByType DEFLATE text/css
  AddOutputFilterByType DEFLATE text/html
  AddOutputFilterByType DEFLATE text/javascript
  AddOutputFilterByType DEFLATE text/plain
  AddOutputFilterByType DEFLATE text/xml
  AddOutputFilterByType DEFLATE image/svg+xml
  AddOutputFilterByType DEFLATE application/vnd.ms-fontobject
  AddOutputFilterByType DEFLATE application/x-font-ttf
  AddOutputFilterByType DEFLATE font/opentype
  AddOutputFilterByType DEFLATE font/ttf
  AddOutputFilterByType DEFLATE font/eot
  AddOutputFilterByType DEFLATE font/otf
  AddOutputFilterByType DEFLATE font/svg

  # Remove browser bugs (only needed for really old browsers)
  BrowserMatch ^Mozilla/4 gzip-only-text/html
  BrowserMatch ^Mozilla/4\.0[678] no-gzip
  BrowserMatch \bMSIE !no-gzip !gzip-only-text/html
  Header append Vary User-Agent
</IfModule>
Save the file, upload it, and clear all caches. If you see a 500 Internal Server Error, restore your backup and contact your host; the mod_deflate module may be disabled.
Manual Method 2: Enabling Gzip on an Nginx Server
For Nginx servers (common on VPS and managed hosting), you’ll need to edit your nginx.conf file, which usually requires SSH access. After backing up the file, add the following directives from the ngxhttpgzip_module inside your http {} or server {} block:
gzip on;
gzip_vary on;
gzip_proxied any;
gzip_comp_level 6; # Compression level (1-9, 6 is a good balance)
gzip_buffers 16 8k;
gzip_http_version 1.1;
gzip_min_length 256; # Only compress files larger than 256 bytes
gzip_types text/plain text/css application/json application/javascript text/xml application/xml application/xml+rss text/javascript image/svg+xml application/x-font-ttf font/opentype font/ttf font/eot font/otf;
This code enables Gzip, sets a balanced compression level, and specifies which file types to compress. After saving, test the configuration and reload Nginx:
sudo nginx -t
sudo systemctl reload nginx
Then clear your caches and verify Gzip is active. If you’re unsure about this process, ask your hosting provider for assistance.
Gzip Alternatives and Advanced Considerations
While wordpress performance optimization gzip compression is a fantastic tool, I think it’s helpful to know about its modern alternative, Brotli, and how it fits with other optimizations.
| Feature | Gzip | Brotli |
|---|---|---|
| Compression Ratio | Good (70-90% for text) | Better (15-25% smaller than Gzip) |
| Speed | Very fast compression/decompression | Slower compression, fast decompression |
| Browser Support | Universal (82% of websites use it) | Widespread (most modern browsers) |
| Primary Use | General web compression | General web compression, fonts |
| Server CPU | Low-moderate (fast) | Moderate-high (for compression) |
The Next Generation: Brotli Compression
Developed by Google, Brotli compression offers a 15-25% better compression ratio than Gzip, making your files even smaller. While it uses more CPU to compress files initially, decompression in the browser is extremely fast, making it ideal for static assets. Most browsers support Brotli, and the easiest way to use it is through a CDN like Cloudflare, which often enables it automatically. I typically recommend starting with Gzip and then enabling Brotli via a CDN for an extra performance boost.
How Gzip Works with Other Optimization Techniques
In my experience, Gzip is a team player. It works best when combined with other strategies:
- Caching: Caching plugins (like WP Rocket) store static versions of your pages to reduce server work. Gzip then compresses these cached files, creating a powerful two-step optimization.
- Minification: This process strips unnecessary characters (comments, whitespace) from CSS and JavaScript files. Gzip then compresses these already-smaller files even further.
- Image Optimization: This is a separate process. Gzip is for text-based files and does nothing for already-compressed formats like JPEG or PNG. You must optimize images separately by resizing, compressing, and using modern formats like WebP. This is a critical part of my Responsive Website Design process, as images are often the heaviest part of a page.
Potential Downsides and What to Watch For
While overwhelmingly beneficial, there are a few things I want you to know. The server CPU usage for Gzip is negligible on modern hardware. The performance gain from sending smaller files far outweighs the minimal processing cost. Also, avoid compressing already-compressed files like JPEGs or ZIPs, as it’s ineffective; the configuration code I provided earlier correctly targets only text-based files. Finally, historical security concerns (like CRIME/BREACH) have been mitigated in modern, updated servers and are no longer a practical issue.
Frequently Asked Questions about Gzip Compression
Over my years as a designer, I’ve answered many questions about Gzip. Here are the most common ones.
Can Gzip slow down my server?
Technically, compression uses a tiny amount of CPU. However, on any modern server, this cost is negligible compared to the massive performance gain from transferring much smaller files. The net result is a faster site and a more efficient server. I’ve never seen a case where Gzip caused a performance problem.
Do I need Gzip if I use a CDN?
Yes. A good CDN will compress assets it serves, but your origin server still needs to serve the main HTML document and act as a fallback. Enabling Gzip on your server and using a CDN that also compresses is the best practice for end-to-end optimization. It’s a belt-and-suspenders approach that ensures everything is compressed.
My host says Gzip is enabled, but I still see a warning. Why?
This is a frustrating but common issue. If your host confirms Gzip is on but tools like PageSpeed Insights still show warnings, here are the likely culprits:
- Partial Configuration: Gzip might be enabled for HTML but not for CSS, JavaScript, or font files. Double-check your server configuration.
- Caching Issues: An old, uncompressed file might be stuck in your site, server, or CDN cache. Clear all caches thoroughly.
- Third-Party Scripts: Your server can’t compress files loaded from external domains (like analytics scripts or social media widgets). If their servers don’t use compression, you’ll see a warning.
- Proxy or Firewall Interference: Some security services can strip the
content-encoding: gzipheader that tools look for. - File Size Thresholds: Nginx’s
gzip_min_lengthdirective prevents compressing tiny files where it wouldn’t be efficient. Tools may still flag these.
If you’re stuck, providing the specific warning to your host can help them diagnose server-side issues. Sometimes, a Website Security Audits can also uncover interference.
Conclusion
WordPress performance optimization gzip compression is a high-impact, low-effort win for your website. By shrinking text-based files by 50-90%, you deliver a faster experience that leads to better engagement, lower bounce rates, and improved search rankings.
In my 20+ years of experience, I’ve seen that respecting a visitor’s time with a fast site is crucial for success. Gzip is accessible to everyone, whether through a simple plugin or manual setup, and it works quietly in the background once enabled.
Gzip is one part of a full performance strategy that includes caching, minification, and image optimization. When combined with thoughtful Custom WordPress Design, these elements create a site that performs as brilliantly as it looks.
If you’d rather focus on your business than on technical details, I understand. My WordPress Maintenance services can handle all performance optimizations for you, ensuring your site is always fast, secure, and up-to-date.


